Wednesday, December 19, 2012

My Best Wedding Makeup Tips

Should You Have a Professional Makeup Artist Do Your Makeup?

Your wedding day is the day you want to look your absolute best, and I wold definitely recommend having a professional bridal makeup and hairstylist do your makeup. Not only because they will make sure your makeup is long lasting and looks great in photos, but you will be pampered and not have to stress about doing your anything but sitting back and being taken care of. 

You Know That Friend Of Yours Who Really Knows Makeup? 

A lot of brides tell me that they will have their friend do their makeup. Well, unless your friend is a professional makeup artist I would suggest that tis is one day you don't want to have your friend do your makeup. First of all, a professional bridal makeup artist uses specific products to make sure your makeup lasts. Then, they know best how makeup colors will translate in photos. Then, they will most likely will work best under pressure and you can freely tell a them if there's something you don't like, rather then worrying about hurting a friends feelings. 

The Most Important Part of Your Makeup: Your Skin Tone

It doesn't matter how big your eyes are or how glossy your lips look, if your skin looks blotchy or oily, you won't look your best on your wedding day. Your first priority should be making sure your skin looks great, then move on to your eyes, cheeks and lips.
I highly recommend choosing a makeup artist who does airbrush makeup to make your skin look as flawless as possible. 
Pick Your Eyes or Your Mouth as your Focus

A basic rule of makeup is to either play up your eyes or your mouth. Play up both and you risk looking like a clown. So if you decide to go all-out on your eye makeup, keep your lips light with a gloss or a light pink lipstick. If you want to play up your full lips, do so with a bright or deep color, but keep your eyes relatively light.

This is the Day to Play up Your Eyes with Some False Lashes

Unless you're one of those people with such amazingly long eyelashes you are regularly asked if you use Latisse, you'll benefit from some false lashes. I am not a fan of the strips as much as I like the individual eyelashes for your wedding day. They look and feel way more comfortable and natural. 
Two Words: Waterproof Mascara
Whether or not you are an emotional gal, there's a chance you will tear up sometime during your wedding day. The last thing you want is black tears running down your cheeks! 


Prime, Prime, Prime


Just as you would prime a wall before you paint, you should prime your face before you apply anything powder-based. I swear by eyeshadow primers -- nothing, and I mean NOTHING works better to keep your shadow from melting into your eyelid crease. I use a primer every single time I wear eyeshadow. Also, make sure you use primer before your foundation foundation. Primer fills in pores and fine lines and you'll find your foundation glides on effortlessly.

Invest in a Highlighter Pen

One of the products I use religiously on brides is  Yves Saint Laurent Touche Eclat Concealer. Although it's called a concealer, it's really a highlighter. Trust me, nothing brightens the face more.

The Trick to Keeping Lipstick in Place


Who has time to apply lipstick or gloss every half hour when they have 200 guests to entertain?
On my brides, I always use a long lasting lipstick such as the MAC longwear color or Chanel Longwear. However, here are some tricks you can do to make sure your lipstick stays in place all day:
  • The morning of the wedding, exfoliate lips by slathering them with Vaseline. Scrub them in a circular motion with an old toothbrush.
  • When you apply makeup, fill in lips with a lip liner.
  • Apply lipstick or gloss over this. The lip liner is key to keeping color locked in place.
  • Keep your lip liner close at hand so you can refresh your lips a few times during the evening. Better yet, put one of your bridesmaids in charge of lipstick/gloss duty.

DO NOT Wax the Day Before Your Wedding

You may be able to cover up a red upper lip or brow with a thick concealer, but trust me the redness will wear through at some point. It's best to wax no less than 48 hours before a big event.

Oily Skin? Carry Blotting Sheets


To keep your oily skin at bay, definitely set your makeup with a loose powder before you walk down the aisle, but don't keep overpowdering skin as the day and night wear on. Instead, carry blotting papers. This way you don't have to keep powdering your face all night long. The blotting papers soak up the oils leaving your makeup in place.

Don't Go Overboard With the Fake Tan

If you like the tanned look, get a spray tan or at least use a self-tanner you know works. If you're new to fake tanning, be careful because the orange look on your wedding day is not cool. Also, self-tanners reek and you don't want to reek on your wedding day.

Exfoliate in the Weeks Up to the Wedding


To make sure your skin looks its best, exfoliate your face and neck once or twice a week a couple months before the wedding. A week
 before your wedding, I always recommend treating yourself to a professional facial 

Just Say No to the Gum

Another good item to pack is breath strips. Today is not the day to be chewing gum or sucking on mints.

Wednesday, December 12, 2012

Holiday Party Hair Ideas

With the Holiday parties just around the corner, I am always looking for fancy hairdo's for my clients. Here are some of my favorite do's for this holiday season and how to achieve them with a few simple steps.

This stunning do is great for a glamorous event. Curl your hair all over. Then, comb it through with a shine serum into 2 low ponytails at the nape of the neck. Pin the curls in the back to create a chignon like appearance and making sure they connect. Finish with some hairspray and shine serum.

I love the Old Hollywood curls for a party. Create a deep part in your hair. Then curl the hair in sections  towards your face. Run a wide toothed comb through your hair to break up the curls. Then finish with spray and shine serum to make the hair stay and look very shiny. 


This smooth ponytail is great if you don't have much time to get ready. Simply run smoothing serum all over your hair. Then part it where you want it and create a low ponytail. If your hair is short, you can always add some extensions to the ponytail. As always, finish with hairspray and shine spray. 


This is a very simple do and is great when you are wearing a glamorous dress to balance out the look. Simply gather your hair into a high ponytail with your hands but don't pull the pony all the way through. Get some bobby pins and place them to create a messy bun. Spray with hair spray all over. 


A high ponytail is always so glamorous and chic. Blow dry your hair to get rid of frizz and apply a smoothing serum. Then, tease the top of crown of your head, smooth it out and with a smoothing brush, comb your hair into a high ponytail. Spray with hairspray and curl the ends of the ponytail. 

These beachy waves are great for any occasion and are very popular. After you wash your hair, apply some salt spray and let your hair air dry. Then after it dries, wrap your strands around a 1.5inch curling iron and after you are done, use a blow dryer to separate the curls. 


Blow dry your hair to smooth it out and  then curl hair all over. Part the hair where you like it and pull it back in sections and rolling the hair. Secure it with bobby pins, making sure it is loose and soft. Spray with hair spray. 


Wednesday, December 5, 2012

Lesson of the Day: How to Apply Mascara


One question I get a lot from people is what mascara I use. I have somewhat normal size eyes, but I swear when I apply a good mascara, they look so much bigger and brighter. So, I don't leave the house without mascara! 


Here, I share with you my favorite tips and tricks for mascara application


To ace your mascara application, follow these 3 simple steps:  
  1. Step 1: Wiggle the wand left to right at the base of lashes. It's the mascara placed near the roots -- not the tips -- that gives the illusion of length.
  1. Step 2: Pull the wand up and through lashes, wiggling as you go. The wiggling part is key because it separates lashes.
  1. Step 3: In this final step (which I always skip), close the eye and place the mascara wand on top of lashes at the base and pull through to remove any clumps.
Pick the Best Mascara for You
When picking a mascara, you should consider the formula you want (lengthening, thickening, waterproof or non-clumping). 
You should also consider price. You can get a good basic drugstore mascara or spend more money on a luxurious mascara. I find the fancier mascaras go on with less clumping and last longer, but it's likely no one would be able to tell if you were wearing a drugstore brand or a department store brand. I really love the L'oreal Voluminous mascara for a drugstore brand and Lancome's mascara if you don't mind the splurge.


How to keep lashes from clumping:
For some, lash combs are just too much work. But for some makeup artists, they're a great invention and keep lashes glob-free and perfectly separated. To use a lash comb, first apply mascara at the lash base, then wiggle the lash comb through to the tips of your lashes.
Not into the lash comb? Get rid of clumps  by removing excess mascara from the wand. Wipe wand on tissue, this eliminates blobs BEFORE you start.
Another great way to get rid of clumps is to sweep a clean, fresh mascara wand through lashes when they're wet. Either buy new ones or recycle old ones. 
Recycle an old mascara wand if you don't want to bother with spoolies. When you finish a mascara, clean the wand in a cap-full of eye makeup remover, then wash with soap and dry. Keep it clean by washing it whenever you wash your makeup tools.

Don't Be Afraid to Mix Mascaras
A trick makeup artists use to make lashes pop is apply one coat of lengthening mascara, followed by one coat of thickening mascara. Remove excess product with a clean spoolie wand (see above).
Try a Colored Mascara
Basic mascara rules are simple: Black works for everyone but can be harsh on light-skinned blondes. Blondes should opt for brown/black by day and reserve black for night. Burgundy or plum colors make blue eyes pop, as do blue mascaras. Purple mascara looks great on brown eyes.

Use an Eyelash Curler

I cannot live without my eyelash curler. Curling lashes gives eyes the appearance of being wider and brighter. Shoot warm air from your blowdryer on the curler for 3-5 seconds to warm it up before curling lashes. Make sure you curl your lashes BEFORE the mascara so you don't rip out any lashes.  My favorite curler is hands down Shu Umura. 
Use a Mascara Primer
If you want an extra boost, a lash primer is a step well worth it. It makes your lashes appear thicker while conditioning them. I usually only do this step when I have a special occasion. 


Don't apply more than 3 coats!


Usually 2 coats is plenty to make your lashes look their best, however if you must apply a 3rd coat that is the maximum I would recommend. Any more coats of mascara and it will end up looking clumpy and un-natural.


Wednesday, November 28, 2012

A Beautiful Wedding at the Ritz Carlton, Laguna Niguel

Just a few months before August, we were contacted by the very talented coordinator Natalie from A Good Affair . Her client, Lewina was very clear that she wanted to book our Grace to be her bridal makeup and hair stylist for her wedding day. Lewina was getting married at the Ritz Carlton in Laguna Niguel and everything about her wedding was about the details and so unique. She had 2 ceremonies, a traditional Chinese tea ceremony and an American ceremony. Her dress was one of a kind, not your typical white wedding dress! For her hair and makeup she chose to go pretty natural, just enhancing her beautiful features. Her photographers, Derek and Sarah from Frenzel Photographers did an amazing job capturing the day. Take a look for yourself and enjoy!


Contact Us for more information about our makeup and hair services. 

Monday, November 19, 2012

Linda & Anthony Get Married


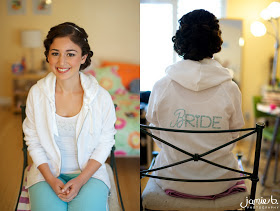
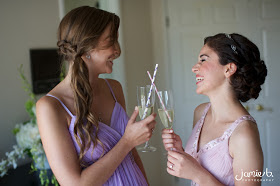
Linda and Anthony got married in August at the Armenian Cathedral and then had their reception at the Hilton Hotel in Universal City. Linda chose one of our artists, Tara as her makeup and hair stylist for her wedding. She met Tara last year, when she was doing hair and makeup for her cousin's wedding and fell in love with her work. I don't blame her, Tara does beautiful hair and makeup and has such a calm and sweet personality that she is the person you want to have around on your wedding day! After the wedding Linda wrote to Yana Beauty Studio, raving about how she felt so beautiful on her wedding day... and we cannot be more grateful that we got to make that happen for her! Check out pictures of the beautiful bride Linda, which were taken by the very talented Jamie from Jamie B Photography. If you want to check out some more photos of this beautiful wedding, you can visit this link. Enjoy! 

xoxo,
Yana


Please 'like' Yana Beauty Studio Facebook page for makeup and hair tips 

Saturday, November 17, 2012

Rainy Day Hair

It's raining today and if you are like me, spending time on your hair is an effort and having it get wet is no fun. However, who said you still can't look cute in the rain. Here are some cute weatherproof styles that will be safe in the rain, wind or humidity. 

Braids are an easy solution when the weather is wet and icky. It keeps the hair from frizzing and stays in place.
Start by parting your hair in the center or on the side, depending on your preference, and then separate your hair into pigtails. Braid each side and secure it with a metal-free, fabric-covered elastic band (this reduces damage done to your ends). Next, take the braid on your right side and wrap it across the top of your head, using two to three bobby pins to fasten it directly behind your left ear; repeat the steps above with the opposite braid.

This cute, casual bun is great for wet and humid weather. It's really simple to do... just follow these steps:  
1. Use some serum to smooth your hair of any frizziness
2. Pull it up into a ponytail on top of your head using your fingers or a comb to smooth out the hair.
3. Secure with a snag-free ponytail holder
4. Twist the ponytail in a circle and secure with bobby pins
5. Finally spray it with a strong hold hairspray to make sure it stays 

This is an easy style that can be achieved anytime, anywhere.  Caught in the rain? As long as you have an elastic band you're set!
First, bring your hair to either the left or right side of your head so it lays on your shoulder. If you're all about volume at the crown, tease hair until you've reached the desired lift using a comb. Then, begin braiding your hair and secure it with a rubber band. VoilĂ ! 


Here's another quick and easy updo you can do if you are caught in the rain. 
Just create a  side part, and using a boar-bristle brush  smooth your hair and gather it to one side. Then, start braiding your hair down to the ends, securing it with an elastic band.  Finally, wrap the hair around itself (into a bun) against your head. Secure with bobby pins and U-pins to keep the braided bun from unraveling.


I hope you try these fun hairstyles and let me know if you have any questions or comments! 


Love,
Yana 

Your very own personal makeup and hairstylist